

- Great user experience (UX) because it is using the native components and interactions.
- Not so great developer experience (DX) because we have to build the same app twice.
- Decent DX because we only have to write the code once.
- Not so great UX because it is using web technologies instead of native components.
What is React Native
React Native is a cross-platform mobile JavaScript framework developed by Facebook and open-sourced in 2015. It takes the same declarative and modular style of building applications with React and brings it to mobile development. One of the key differences between React Native and other hybrid solutions is that it is not aWebView inside an app shell. It is creating real native applications that use the same fundamental UI building blocks as regular iOS and Android apps, but you are just putting those blocks together using JavaScript and React. For example, React Native has a concept of a
View that actually renders:
UIViewfor iOSandroid.viewfor Android
Airship and React Native
We started using React Native in 2016, and we've shipped numerous apps to the App Store over the past 2 years. It was only after jumping in that we fully realized the power in this framework. We had two main observations:- The developer experience is extremely similar to writing React on the web. With this, our entire team essentially became mobile developers, which is a HUGE deal. In the past, we've only had a couple of developers who had any mobile experience, so their plates were always full with every mobile project we had lined up, but now we can literally have any developer on our team contribute to our mobile projects (and they have!). New developers coming in only have one basic framework that needs to be learned for front-end development and then they can immediately start working on web and mobile applications!
- The apps we built just “felt” a lot more native than previous cross-platform frameworks. This is something that really just needs to be in your hands to get the full effect. And actually, you most likely have interacted with React Native on your mobile device and didn't even realize it.
Companies Using React Native
There are a lot of very large companies using React Native in production right now:- Airbnb
- Tesla
- Amazon
- Walmart
- Microsoft
React Native Bridge
Everything that is available to a native application is accessible. React Native's creators didn't build an API for every native feature, but they did build a way to make anything available to the JavaScript side of the application through something commonly referred to as the “Bridge.” This concept of the “bridge” is a channel that facilitates communication between the JavaScript side and the native side. This is how the JavaScript is able to render UI natively, and also how the native side can send native events to the JavaScript side. This bridge is also accessible to be used with custom native code, so as a developer, you can easily access anything that you need natively. When Face ID came out, we were in the middle of development for a customer's mobile app. They immediately wanted to have it in their app. With other frameworks, we might have had our hands tied by the maintainers of that framework until they built the feature or plugin. With React Native, we had the ability to immediately start experimenting with that native functionality in our app. It actually turned out that there was someone with a working library within weeks of Face ID being announced, so we were able to add that into our project fairly easily. This goes to show that there are basically no barriers between what a native app can do and what is possible in your React Native app. If you know how to add the functionality natively, you can do it in here as well.Compare with React
The bridge is a fairly new concept if you're coming from the React world, however, there is a lot to React Native that we can easily compare with what you already know in React. Here are a few important distinctions.Setup
iOS- Xcode is required
- Can't build on Windows
- Android Studio is required
- Works on both Mac & Windows
Bundle
React Native ships with its own bundler, so there is no need for managing a bundler like Webpack. This includes ES6 and some ES7 features built-in, so no need for adding the babel plugins.Creating & Running the App
React Native has its own CLI tool to help with a number of tasks. Here we are creating a new project with react-native init and then running it with
react-native run-ios. This will use the iOS simulator by default, but it can also be run on your physical device. For Android you would just run
react-native run-android and it would run on the Android emulator or a physical device that is plugged in.
Building Blocks
Instead of rendering HTML elements to the DOM, React Native is rendering native elements in the UI. To create the native elements, React Native is comprised of a set of primitive components that everything is built from. These are essentially the “Building Blocks” of your application.<div /> - <View /> <span> <h1> <p> etc. - <Text> <img /> - <Image /> <input /> -
<TextInput /> These are just a few, but there are many more primitive components from React Native available.
NOTE: Due to React Native not using web elements, most UI libraries for React will not work unless they have their own React Native equivalent built-in to the library.
Styling
For styling, there is no special language or syntax needed. You just style your application using JavaScript. All of the core components accept a prop namedstyle. The style names and values usually match how CSS works on the web, except names are written using camel casing rather than using a hyphen. Not all CSS properties are supported, but the majority are.
const styles = StyleSheet.create({
  headerContainer: {
    height: 70,
    paddingTop: 10,
    backgroundColor: '#102c52',
    alignItems: 'center',
    justifyContent: 'center'
  },
  headerText: {
    color: 'white',
    fontSize: 20,
    fontWeight: 'bold'
  }
});
 React Native also takes advantage of using Flexbox for layout and positioning. This works exactly how Flexbox is used on the web, so you don't have to learn some new pattern for layout. This is the preferred way of handling layout to provide consistent UI on different screen sizes.
<View style=>
  <Header />
  <View
    style=
  />
  <View
    style=
  />
  <View
    style=
  />
</View>

Platform-Specific Code
iOS and Android native apps typically look and feel relatively different, so you can use thePlatform module to handle specific functionality and appearance for each. In the code I can check what type of device it is and do specific actions with that, whether it is something extra that I want to happen on an Android device or if I want to apply a specific style for iOS only. With that said, RN will absolutely work without any special attention to the platform. The decision is up to you.
componentDidMount() {
  if (Platform.OS === 'android') {
    doAndroidStuff()
  }
}

...

matchDetailContainer: {
  borderWidth: Platform.OS === 'ios' ? 1 : 2
}
User Interaction
As I mentioned earlier, users have some level of expectation to how they interact with their apps, and native apps sets the standard for what is expected. React Native has a couple of ways to tie into those native interactions to make everything feel and look more native.Touch
With RN, there are no anchor tags, but anything can become clickable by using one of theTouchable components.
<TouchableOpacity>
<TouchableHighlight>
<TouchableWithoutFeedback>
They behave visually as their names imply, and they have an
onPress event handler to trigger anything you want from a touch.
<TouchableOpacity
  onPress={doSomething}
  style={styles.container}
>
  <Text style={styles.text}>
    {this.props.info}
  </Text>
</TouchableOpacity>
Animations
React Native comes by default with a very robust animation library calledAnimated that provides pretty much any detail of animation needed. This is very similar to the Velocity.js library for the web. It allows you to create animations in a very declarative way.
animate = animation =>
  Animated.timing(animation, {
    toValue: 1,
    duration: 900,
    useNativeDriver: true
  });
Gestures
React Native provides thePanResponder module to handle user gestures. This can recognize multi-touch gestures as well as swipes and other touches that make native apps feel snappy and intuitive. The API isn't as clear as some of the others here, but it is still extremely powerful tool that is used quite frequently.
Developer Workflow
React Native has some powerful tools built in to enhance the developer workflow. Hot Reloading & Live Reloading are built in, and it uses Chrome Developer Tools for debugging by default.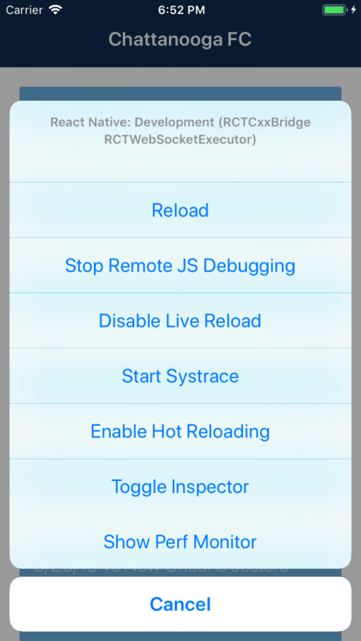
Over the Air Updates
Since there is just a JavaScript bundle controlling the application, there are a few technologies in the community to enable over the air updates to your app. CodePush by Microsoft is a technology we've used for this. If you have ever worked with mobile apps in the past, the process of getting out a new update for a bug fix can be quite troubling.- Fix the bug
- Submit new update to Apple for review, which can sometimes takes multiple days to get approved.
- All of the users have to download the new version
- This is one of the toughest parts. Most users don't update their apps very often, so getting 100% of your users to actually download the newest version is almost impossible.
Future of React Native
Lastly, I want to look into what the future might hold for the React Native ecosystem. When committing to a new framework, we didn't want to spend valuable time learning a new technology, only for it to be obsolete within a few years. If you've been in web development for a while, you're definitely experienced this. One of the exciting things about the React Native ecosystem is how far its reach is spreading into all aspects of development and the stability it has. When React came out it was revolutionary in how it changed front-end development. When people realized that the same underlying framework could be used for mobile as well, React Native was born. People have continued to push the limits of what React Native is capable of, in areas such as:- Virtual Reality
- Augmented Reality
- Windows & Mac desktop apps
- Music
- XBox One
- Apple TV & Android TV (actually supported by default with React Native)
React Native is a rough first draft of a framework that is not directly coupled to an individual platform's primitives. This means you can describe the majority of your application UI in a simple and expressive form that can then be rendered by a variety of "backends".https://twitter.com/necolas/status/983769339596853248 We've still got a long way to go before that dream is fully realized, but it's exciting to see the future of what people are working on and their vision behind it. With the possibilities of using the core functionality of React & React Native in all of these places and the fact that a lot of large companies are investing into the technology, we felt like it was a wise decision to jump in, and we haven't looked back since.


